

How To Start Your Blog and Host For FREE

When starting a blog, it is important to pick a correct platform to facilitate the blog's growth. Otherwise, we will lose many possibilities if we choose to not go with modern blogging.
Note, When you read this guide and implement all the steps, you will have a new modern blog up and running.
Download your copy of a modern blogging solution and follow the steps. If you don't have time to do the steps or you feel lazy today, you can order us to set it up for you.
Blogs are among the best traffic sources for bringing organic traffic to your business. Unfortunately, many businesses and bloggers don't pay close attention to many fundamental features of the blogging platform when they start a blog. Search engine optimization (SEO) is crucial for blogs. That's why the blogging platform should be search engine optimization friendly (SEO-friendly). Moreover, starting from 2018, the load time has become a differentiating factor for Google to downgrade the slow performing websites in the search result pages.
This and other changes in the technology world brought a new movement that allows businesses to build blazingly fast, secure, easy to use, search engine friendly, and flexible.
Using this blogging solution, you will have all the benefits of modern web trends. Also, You will get many SEO and other tools to help you write excellent content.
The best part is that you will get it FREE and can have your blog up and running after a few minutes!
Last but not least, you own the source code and all the data. The platform is so flexible that you can integrate it with an e-commerce shop, turn it into a news website, or make whatever changes you want.
The solution is built with a modern and popular Javascript framework called React. If you want to add features to your blog that we don't support, you can easily hire a great React developer who can implement it for you. However, at first, you can ask in our community Facebook group if the feature is supported or is going to be supported in the next versions. Maybe peers in the group have implemented the feature and are willing to share it with you and the community?
Installation
Sanity Content management system setup
Go to the sanity folder and run sanity init
Answer "Y" to the first question "The current folder contains a configured Sanity studio. Would you like to reconfigure it?"


On the next prompt "Select project to use" choose "Create new project" 1.3 Enter your project name. Choose a name that would be similar to your domain name


Answer "Y" to the next question about the choice between private and public datasets ("Use the default dataset configuration?"). Don't worry only the data that you publish would be available to the public and you want this!


Congrats! Your project is now created locally and in Sanity.
2. Run sanity start
2.1 The Sanity project would be launched on the local machine. The command line would tell the address of the service. It should be http://localhost:3333


Copy the address http://localhost:3333 and paste it on the address line of your browser.
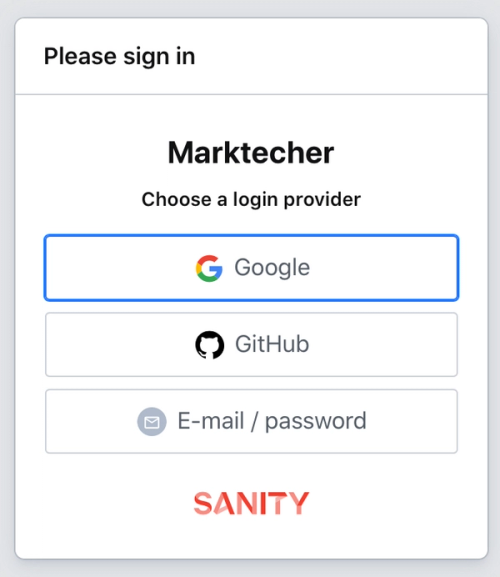
Login/Sign-up with Google/Github or with your E-mail credentials.

Done! You can now create your content. Don't worry about the name of the project we will change it in the next step and you will see the new name next time.
The first blog post
Now, we will create the first blog post.
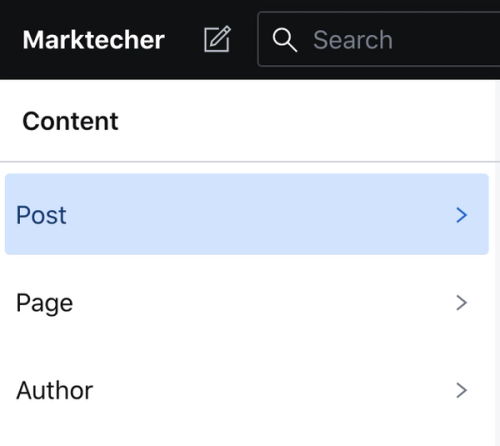
Click on the "Post" Under the "Content" Menu

Click the Pencil icon on the opened submenu

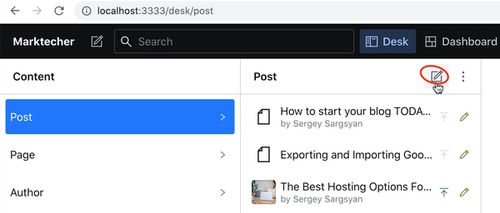
Alternatively, you can create a blog post or any other document with the "Create new document" button


And select the document type that you want to create. We are creating a blog post that's why we need to click on a "Post"


Enter the title of the blog post.


Now, it's time to generate the slug for the article. In case you don't know, the slug is the part of the page URL that will be available on the internet.
Let's say that your website is hosted on https://www.mycoolwebsite.com and you named the slug of your blog post as my-first-post then your blog post would be available on https://www.mycoolwebsite.com/my-first-post
There are technical and Search Engine Optimization (SEO) rules for the slugs. Considering all of them, we want to avoid all symbols apart from letters, numbers, and hyphens ('-'). Also, please try to use only lowercase letters for the slugs.
To make slug naming easy and error-free, a Generate button is provided to you, which generates a slug from the title text.

After you have entered the title, click on the "Generate" button, and the slug will be generated for you.
An SEO Note: If the title is to long you can shorten it. Short slugs are preffered.
An SEO hack: If you are using the current year in the title please consider skipping it from the slug. The reason is that in the ideal case we don't want to change the slug. We will discuss the theory behind this in this article. So when you will update the article for the coming year and will update the year you would need to touch the slug.
This blogging solution comes with prebuilt SEO rule checkers. Which makes it harder to make mistakes and inefficiencies before or using SEO tools. Blogging on this platform will be beneficial for SEO specialists as well. Knowing the rules is one thing, but having automatic validation of the content in the content management system (CMS) is an awesome bonus and a time saver. Here you can find all SEO tools and checks which comes with this modern blogging platform.
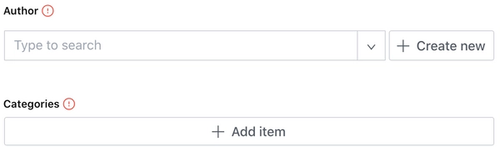
Now, we need to specify the Author.
We can't proceed here because we need to create an author element. Let's skip it for now.
We keep the Categories section empty because we don't have any categories yet.

You can click on the calendar to change the "Published date" of the article. The article's publish date is initialized with the document creation date. In case you create and publish the article on the same day you might not need to change it.
Adding photos to the blog post
The main image would be the hero image of the article. It will also be the thumbnail image of the blog post on the home page and on the other pages that refer to this page. That is why this image is required.
You can upload a photo, or use the Select... button.


With the Select button, you can import an image directly from Unsplash which is a website with royalty-free photos, or you can select from the photos that you have uploaded before.
Then comes the "Alt text", "Caption", and "Author/Source info" fields.
The "Alt text" field is important for SEO. The value here will be used as the alt tag of the image. Great text description can make your page discoverable when people do image searches in search engines. Here you can find the SEO strategies and tactics to make your pages discoverable through images.
The Alt text will not be visible on the page. If you want to describe the image for the visitors right below the image you need to use the caption. This is great for the user experience (UX).
The "Author/Source info" field is for mentioning the author name and/or the copyright holder website.
It is time to write the blog post!
The "Body" text box should contain the text of your article.

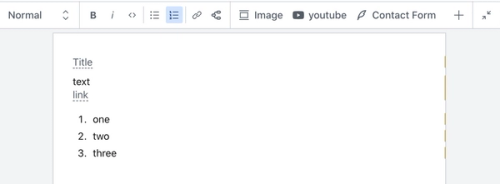
It can also contain photos and embedded Youtube videos and many more elements.

You would have subheadings in the text if the text is long. To use subheadings highlight the text click on the dropdown box that has the "Normal" text on it and change it to H2.

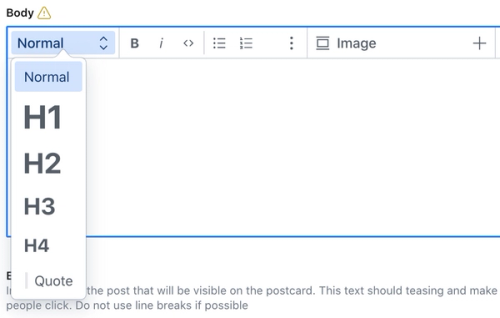
H2 means heading on the second level (subtitle) in the Hypertext Markup language (HTML). If you want to have nested subheadings use H3, H4 in the mentioned order.
Note that the page should have only one H1 (level 1) heading and that is the title of the blog that is the first input of the document.
Correct structure of the heading is important for user experience and for SEO.
The "Quote" option should be used for the quotes. It will apply a special style to the selected text.
Like this quote
You can use Bold, Italic styles for the parts of the text
Using the next buttons, you can add numbered and bulleted lists.
The next two buttons are for external and internal hyperlinks.
When you highlight a text you can convert it to a hyperlink by clicking one of these buttons.
For the external links, you need to enter the target website's full URL in the opened dialog box, e.g., https://www.google.com.
For the internal links, you can select any other page or post that you have previously created.
We don't have any other pages or posts now so we skip this option for now.
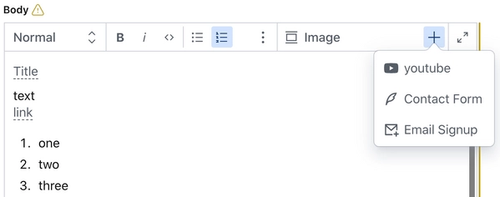
On the right corner, you'll find a plus sign.
By clicking on this sign you can add as many photos, Youtube videos, and other elements to the text as you wish.
For Youtube videos, you need to open the video on Youtube and copy/paste the video's address from the browser's address bar.

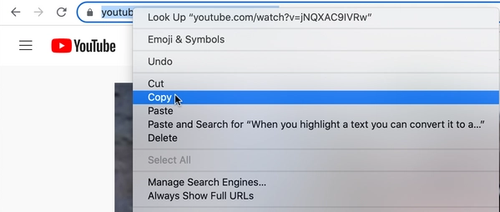
You will see the preview of the video on the editor to be assured that you have used the correct video.
That is all about the body element.
How to attract our visitors to click on the blog post
Let's say that a visitor opened the main page of our blog or s/he read a blog post from you and is suggested the next related article in the read next section. Is the title enough for the user to decide if s/he want to read the article?
That is the reason why we have an excerpt as a mandatory field.
The excerpt field is the short description of the article.
It will be visible on the cards on the main page and the category pages of the blog.

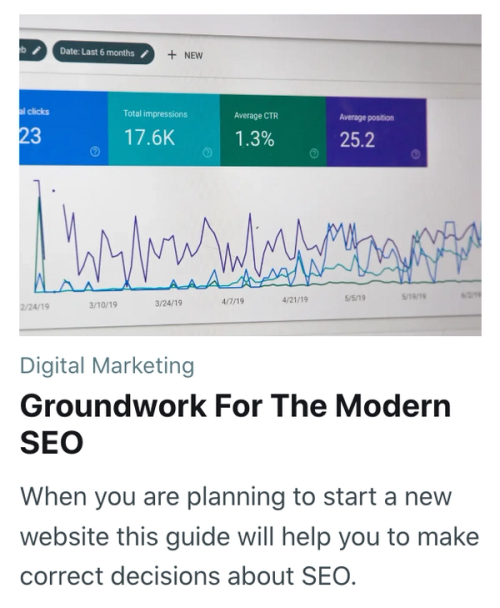
As we have mentioned before the excerpt must attract users to the article.
Note that This is written for the visitors who already know a couple of things about you or your blog. They read this while they are on your blog. So adapt the message accordingly.
How to get traffic from search engines
SEO fields contain the most important fields for SEO.
That's not all, here you can check SEO improvement hints that come from the Yoast engine. Yes, this blogging solution comes with preconfigured Yoast plugin.
When you add the main keyword of the blog post in the "Focus keyword" field you'll get real-time reporting from Yoast about the on-page SEO optimization of the blog post.

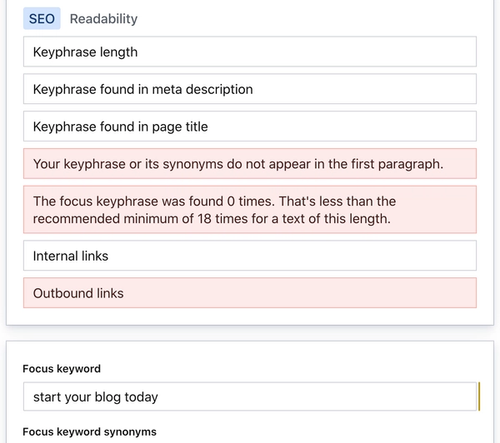
If you click on the Readability tab you will get this.

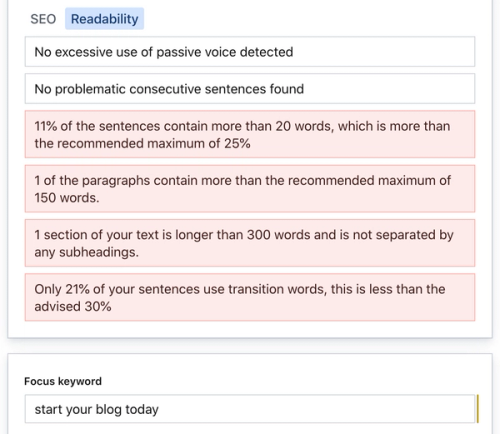
In Addition, you can add synonyms of the focus keyword to make the reporting even stronger. Here you can check why you should use synonyms and how to use them.
Now let's talk about the SEO fields
Meta Title is the text of the link on the search engine result pages
Meta Description is the description that is rendered below the meta title in the search engine result pages
Meta titles and meta descriptions are used by search engines to understand the topic of the web page.
Not only.


As you can see from the screenshot, good meta titles and meta descriptions can bring more visitors from the search engines.
it is not guaranteed that Google or other search engines will use your meta title and meta description in the search engine result pages, but chances are high. The chances are even higher if you will use good meta titles and meta descriptions.
Be it for search engines or be it for the users make sure that you clearly describe the page in these fields.
Also, you can do some magic in the meta description to entice users to click on the search result of your page.
Remember that in contrast to the excerpt meta description is not written for visitors who are already on your blog. It is written for anybody who might discover your blog through a search.
OK! Our first blog post is ready. There are a couple of errors that we will fix shortly after.
The first page
Now you can create a page.
Apart from blog pages, our blog would have pages that are common for websites. For example, Contact us, Impressum, Privacy policy, About us are perfect examples of pages that you would like to add to your blog.
The main difference between blog pages and blog posts is that a blog post has a main blog photo, information about the author, and any other features that a blog post would have, while blog pages don have any of them and are designed for any kind of pages.
When you publish a blog post is automatically shown in the blog posts list. The pages on the other hand need to be explicitly linked from navigation menus, and content or they may act like landing pages and have no internal links pointing to them.
The process of page creation is almost the same as for the post that we have created in the previous step.
The first author
The same fields need to be provided when you create a page for an author.
In addition to the fields that we have seen, here we have the "Social Media Links" section. When we add an URL for one or many supported social media websites, the link to the social media profile will be available after the biography of the author.
Full URLs must be provided. For Facebook, it would be 'https://www.facebook.com/<yourprofileorpage>/'.
Please go ahead and fill the required fields for the first author.
We need to publish the first author in order to be able to finish the first blog post.
When all required fields are filled. The Publish button on the bottom right corner of the editors changes the colour from grey to green.


It is time to push the button and publish the page about our first author!
The first category
Now let's create a category.
You wouldn't find many new fields here compared to the other types of pages that we have created previously.
Before creating the page let's understand what is a category.
We have categories in order to have pages that would group related articles.
For example, if our blog is about internet marketing we could have two categories: SEO and Social media Marketing.
We could have more. But let's keep it simple.
Let's say our blog is available on the https://www.marketingblog.com address. When we open this address we see all the articles.
All SEO articles would be on the https://www.marketingblog.com/seo page and all Social media Marketing pages would be on https://www.marketingblog.com/smm pages. Here the "seo" and the "smm" are the slugs of the SEO and Social Media Marketing pages respectively.
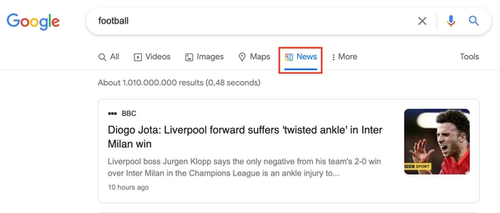
You can change the field in the "Article types" field in some cases. You can set the Article types of the category to the "News articles".
The News articles flag would be helpful if your blog has news sections. For example, if you have a section in your blog when you provide daily news on some topic.
It will optimize all posts under the news category as news articles for search engines.
For example, the articles would rank in the Google News section.

The blog's global appearance settings
The last step before publishing our first blog post is to configure our blog appearance and other important settings. You need to add only one entry here.
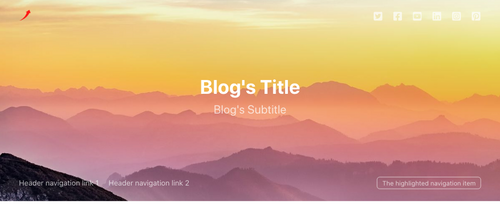
a. The title is the name of the website.
It will be visible on the main page's header section and on the footer of every page before the copyright text.
b. The description is the subtitle of the page that will be visible on the main page of the website/blog under the title.
c. Logo would be visible on top of the pages and will be used as favicon on the tabs. We suggest using at minimum 600-pixel x 600-pixel size for the logo.
d. Cover image will be used as a background image for the pages headers.
e. Header background color defines the background color that will replace the cover photo when the cover photo is missing.
Please use the following color fields if you would like to change the default colors of the various text elements and the backgrounds.
f. Social Media Links will contain your business's pages. Please fill in the social media accounts that you have for your business. If you don't have business pages or if this is your personal blog use your personal accounts instead. When an URL for a social media profile is provided you'll see the social media's icon on the top right corner of your pages.
Here's how the above-mentioned fields will be shown on the blog's home page.

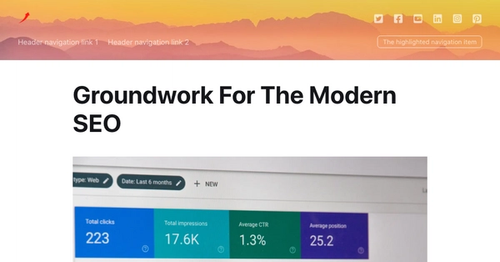
Here's how the above-mentioned fields will be shown on the blog post pages.

Here's how the footer elements are rendered


g. The Language field tells search engines the language of your website. By default, English is selected. Make sure to change this if your blog is not in English.
h. W have seen in the photos how the header navigation links and the footer navigation links are visible on the pages. We add these links by adding URLs or page references to the header navigation bar and footer navigation bars respectively.

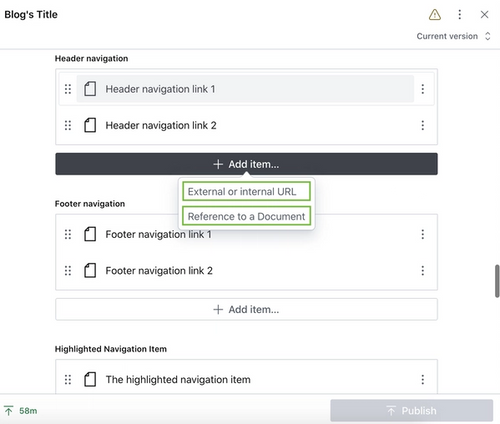
As you can see from the photo, you can add either an external or internal URL or a Reference to a page.
Use the Reference to a Document option to add a reference to one of the blog posts, pages, authors, and category pages.

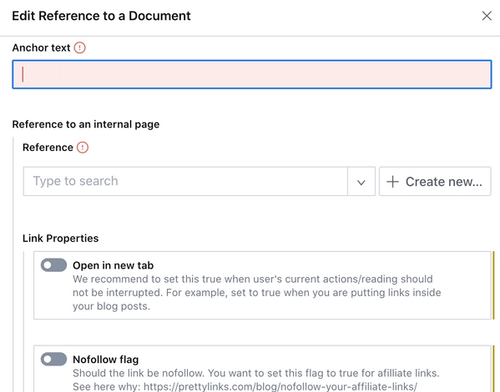
Anchor text will be the visible text in the navigation bar. By opening the reference dropdown you can easily select the target page from the list.
External URLs are URLs to the pages in other websites. They need to start with https:// or http:// prefix
Internal URLs are links inside your website that cannot be selected through the Reference to a Document option. For example, if you have added a static landing page that is not a document on Sanity you need to use the Internal URL option. For example, given that your blog's address is https://www.marketingblog.com/ if you want to link the https://www.marketingblog.com/custom-landing-page-for-black-friday page you just need to put /custom-landing-page-for-black-friday in the URL field.
i. The Highlighted Navigation Item can contain only one reference or URL. The item placed here would be separated from the rest of the header navigation items and will be moved to the right bottom corner of the header section.
Publishing the first blog post
Almost done! Now let's fix the errors in our first blog post.
Open the blog post
Add the author in the Author field
Add the category in the Categories fields
Make sure that all required fields are filled and there is no field highlighted in red.
Click the green Publish button below the article.
Yes! We created a blog and we have the first blog post.
Now, we need to publish the schemas so that we can fetch the data from our frontend and build HTML pages based on the data that comes from the Sanity content management system.
Making the blog's content available for editors and for the web browsers
Now we have the structure and the data only on our machine.
Run sanity deploy in the command line
Now, Sanity would ask you to name deployment.
A short and descriptive name is essential.
You can use the same name as your domain name. This is important because this will formulate the address of your Sanity deployment on the internet. Note that the name should be unique. If somebody else took the name you can try a slightly changed name.
For example, if your domain name is marketingblog.com then I would suggest naming the deployment marketingblog. If you do this your CMS will be deployed on https://marketingblog.sanity.studio.
Upon successful completion, Sanity will print the address of your deployment.
You can edit your blog from any browser and any device now.
We need to deploy GraphQL schema for our sanity project. You don't need to know what is it.
Just copy this text to your command line sanity graphql deploy
You will be asked a question it is not important. Answer 'n'
That's it, We have finished with the content management deployment.
Now we can edit the content from any device and from anywhere.
You can add team members and they'll also be able to edit the pages now.
Deploying the blog
Now, let's deploy the front end of our website.
When we publish articles by pressing publish button they are Published to Sanity CMS.
We will deploy the website separately.
This is the beauty of modern web systems.
The content is not attached to any of our websites.
This gives so much freedom!
For example, the data from the content management can be used by our website and by our mobile applications.
Heck, we can deploy many websites with the same data!
For example, we can keep the old version of the website, deploy a new website with a new design or technology and switch to the new one if we are happy with it.
We know that A/B tests need time.
Since the content lives in one place, we could leave two websites for a long period of time, update both when we publish new content and see with the B variant performs better.
We get extensive flexibility by separating content from the presentation!
Publishing
Locate the Dashboard button on the top of the Sanity control panel and click on it.


Don't press the deploy button yet. Because we need to tell our website's address so the deployment job would know where to publish our website.
Don't worry it is just a text change that we will do a little bit later.
Leave this tab open and open a new tab or a window in your browser.
How can we have a website without hosting, right?
Let's get it for free, forever.
You will ask what's the catch here.
The catch here is that you will need to pay a small amount only if you will have huge traffic.
Most blogs would hardly reach that limit. In case they do, they could easily earn more than the amount per month.
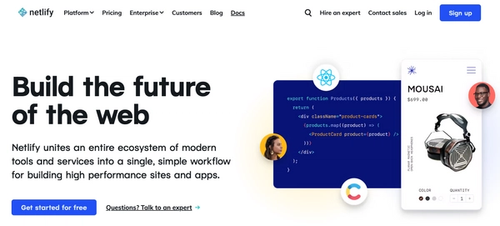
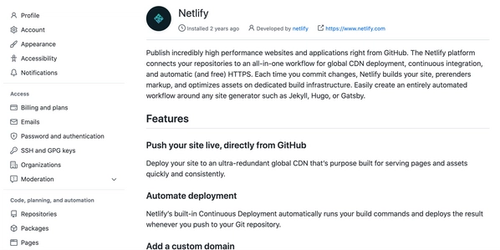
Open https://www.netlify.com on the new tab.
Click the "Sign up" button on the top right corner.

Your best option for registering here would be with Email.
Click on Email and sign up.
Now go to the Sites tab.
There are two ways to deploy the website.
Quick or Longer and recommended.
If you are in rush to see results follow the quick deployment process from the next step.
You can replace it with long term deployment later.
If you want the long term deployment right away, jump to step 14.
Publishing with few clicks
Click Add a new site.
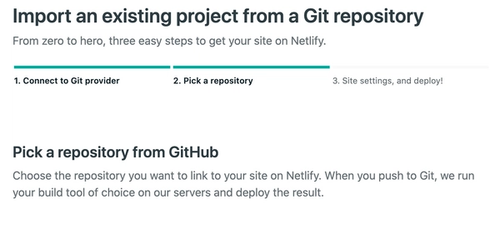
Select Import an existing project.
Click on Github.
In case you don't know Github is a website where people host files, mainly software source code.
In comparison to Dropbox, Google Drive and similar services Github is built around a version control system (called Git). That means that every file change, addition, deletion is registered. Therefore you have the whole history of the file transformations and you can go back to any previous versions of the repository. This is only a small example of what you get when you have a version management system that tracks your files.
You will need to log in to Github now.
Most probably you don't have a Github account so you need to sign up first.
That is as easy as signing up for any service on the internet.
Now we need to create a Github repository.

Enter a name for the repository. Probably the best name would be the domain name. You can change it later if you will change the domain name.
Apart from setting the name, we need to change the visibility of the repository from Public to Private.
As it is written in the case if you choose the Public option, anyone on the internet can see the files in the repository. This is risky if you are not doing it purposefully. Even worse, if by mistake you upload a secret key in the repository then hackers will find it...
So make sure to select the Private option

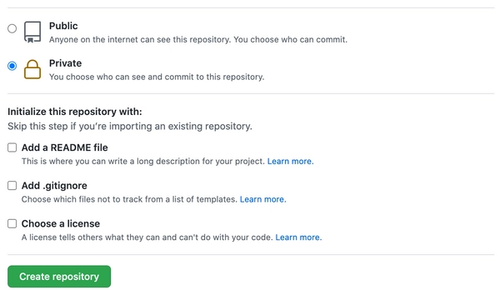
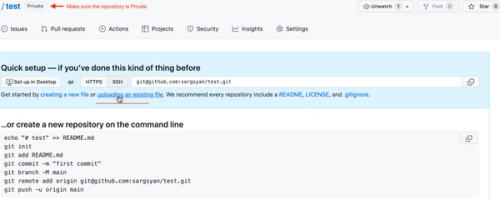
After clicking the "Create repository" button you will see this page

You'll see the following window

Scroll down to the Repository Access section.

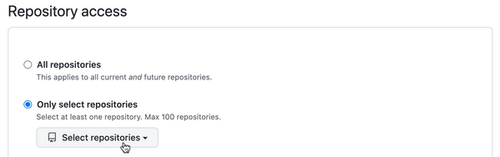
Select the newly created repository from the list.
You will find the repository on the next page of the Netlify console.

Click on the newly created repository.


On the next and the final page

Scroll to the bottom of the page

Fill the fields.
Select the team.
There should be only one team.
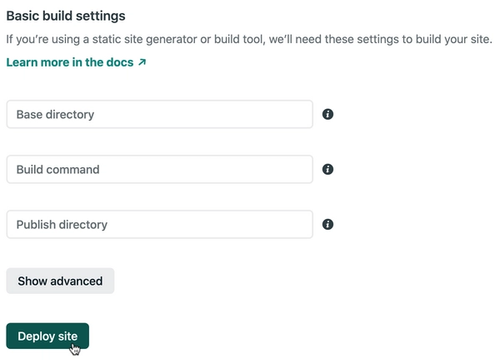
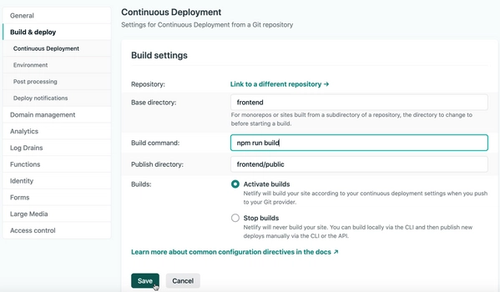
Fill in the following values in the "Build settings" view of the "Continuous Delivery" section
Base directory: "frontend".
Build command: npm run build
Publish directory: "frontend/public"
This is what it will look like:

Click "Deploy Site".
Here we go! We have installed the deployment for our website.

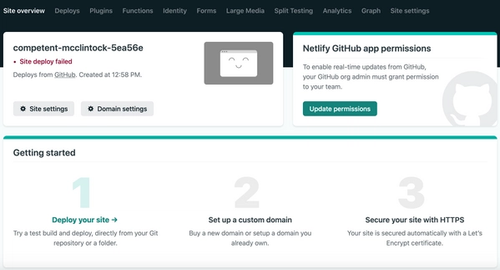
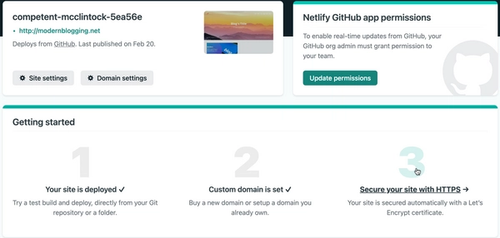
Netlify generates a random and unique domain for your new deployment.

In this case, it is https://competent-mcclintock-5ea56e.netlify.app/
You will see that the site deployment has failed. This is expected because we don't have any files.
We need to drag and drop the files so that the deployment will be successful.
However, before dragging and dropping the files we need to add a couple of changes.

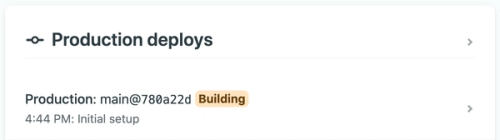
If you don't do these changes we would not be able to deploy a new version of the website from the Sanity dashboard as is shown below.


The following section will tell how to enable the one-click deployment on the Sanity dashboard.
To setup Dashboard for deployment
Here's how to set up automatic deployment of the website from Netlify.
We need to open the desktopConfig.js file
Here's what it looks like:
title: 'Live deployment',
apiId: 'changeMe',
buildHookId: 'changeMe',
name: 'changeMe',
url: 'changeMe
We need to change all the texts that have changeMe inside quotes.
After the changes, it should look like.
title: 'Live deployment',
apiId: '<The Id from the Netlify>',
buildHookId: '<The build Id from the Netlify>',
name: 'My new blog',
url: 'https://www.mynewblog.com'
Now, here is how we will get the IDs from Netlify
apiId
Login Into Netlify https://app.netlify.com/
Select the blog from the list of websites. You should have only one blog/website at this moment


Click on the "Site settings" button

Now we can copy the API ID from the Site Information table.

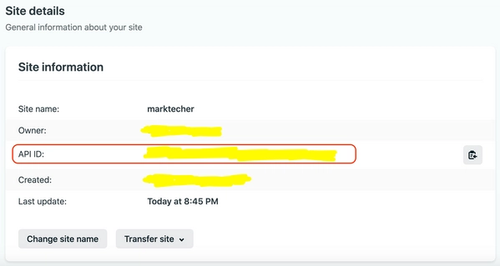
We will replace the apiID: 'changeMe' line with apiID: '<pasted ID>'
buildHookId
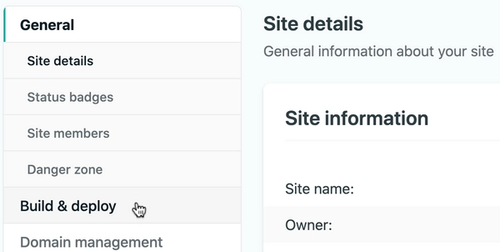
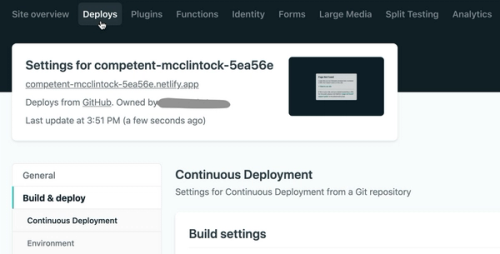
While on Netlify's "Site settings" page of the Netlify, click on the "Build & deploy" button as is shown below.

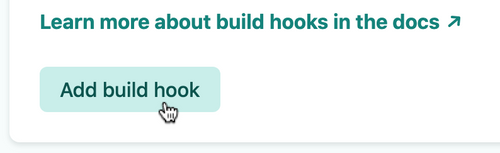
On the opened page scroll down to the "Build hooks" section.
Click on "Add build hook"

Create a book hook name it "Sanity Production"
Select "master" for the branch

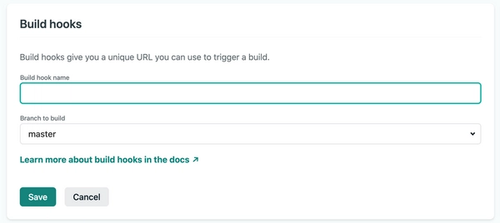
Click "Save"
When you have all the steps correctly now you would be able to deploy the changes from Sanity (Without opening the Netlify console).
Uploading files to the Github repository
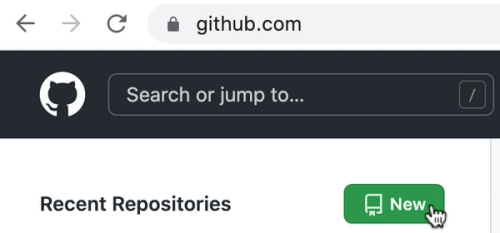
Now we open https://github.com.
We select the newly created repository. We can search for it by name if we use an existing Github account and we have many repositories.

Click on the repository and you will see this page.
As is highlighted on the above image click on the "uploading an existing file" link.

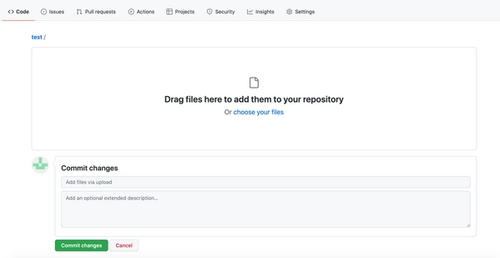
Let's now drop the files.
We need to drop the frontend and sanity folders and commit the changes as is shown below.

Now we can open https://app.netlify.com/ and go to the "Deploys" page to double-check the deployment would be successful.

The build will take a couple of minutes.

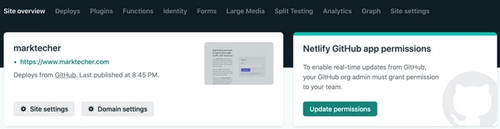
We can refresh the screen and wait for the green "Published" label

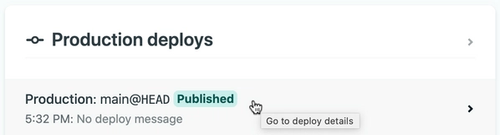
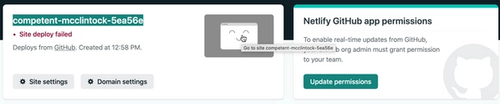
If we'll see Green published in the topmost deployment line then the deployment is successful. We can click on it to go to the deployment details.
And we can go to the Site overview page and open the deployed website.

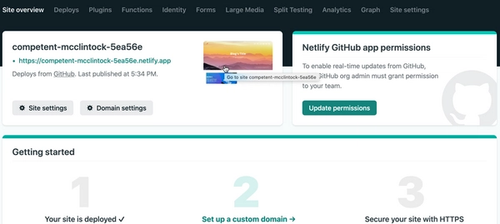
Viola! The website is successfully dee website
Bonus: Adding a custom domain
The randomly generated domain is good for a demo but we need to get a custom domain or use a domain that we already own.

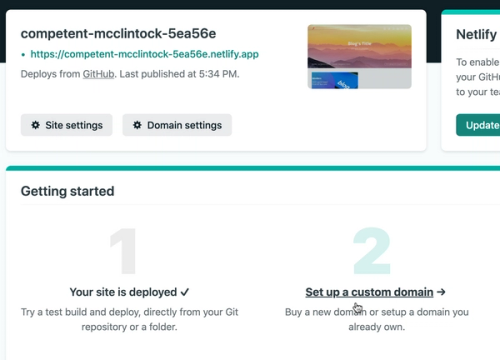
We need to click on the second step to configure the domain.

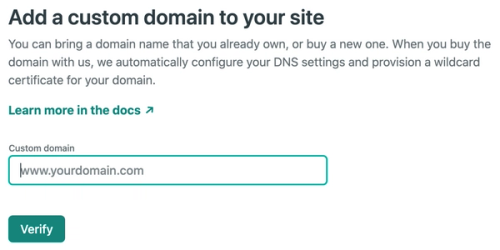
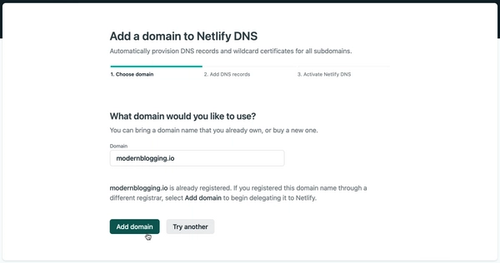
Here you enter the domain name that you already own or a domain name you think is available and you want to buy.
Let's add a domain name that we already own.

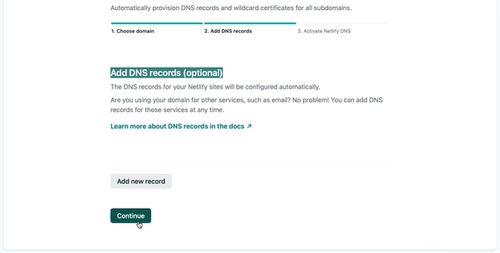
In step 2, we just click "Continue".

In step 3, copy the four name server entries and add them to name server lists in your domain registrar.

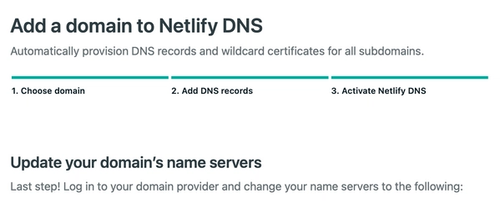
For example, if you use Namecheap as a registrar you can you need to select "Custom DNS" as a nameserver option and paste the 4 nameserver addresses that you have copied a step before.
Now you need to wait a bit. Domain name propagation can take time. But for many domain name providers including Namecheap, this usually happens instantly and you can see the custom domain is already applied to your website on the Netlify dashboard. You can check it by visiting the website with the custom domain address.
The HTTPS protocol should be enabled automatically. If not click on "Step 3" as is shown in the screenshot below.

Scroll down and Provision a certificate.

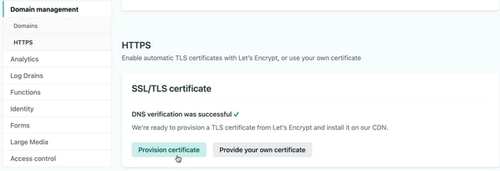
That's it! If everything in the process went smoothly then you should have the custom domain set up on your website with SSL encryption. Your website can now be accessed with HTTPS protocol and with the custom domain name.
Bonus: Setting up the local environment for development


This is needed only if you want to adjust the front end, add features, etc. This portion needs to be shared with the developers if you will hire them to develop new custom features for you.
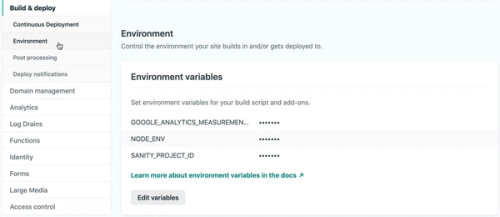
Open the "frontend" folder and select .env.TEMPLATE file.
Copy it to .env file.
Note that since this file starts with a dot it is a hidden file and you might not see it. Please search for "How to see hidden files" for your operating system.
We need to add a value for the SANITY_PROJECT_ID in the copied .env file. This will tell our frontend the location of our content management system.
To get the value for SANITY_PROJECT_ID open https://www.sanity.io/manage/.
Click on your project. There should be only one project.
You will see it under the PROJECT ID text.

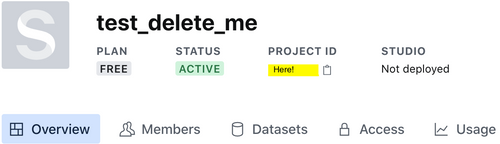
Copy and paste the value after SANITY_PROJECT_ID=. The value should be
SANITY_PROJECT_ID=<the 8-letter id without surrounding quotes>
Don't pay attention to GOOGLE_ANALYTICS_MEASUREMENT_ID for now.
When configured, this flag will help us to get analytics data from Google Analytics. We will configure it later in the next section.
For that open the command line on the current folder
Setup Gatsby environment by following this guide https://www.gatsbyjs.com/docs/tutorial/part-0/ 11.5
After this, we can launch the local development version of the frontend with the following command
gatsby develop
That will run the frontend on our local machine. The URL of the frontend will be printed on the command line.
it should be http://localhost:8000
That's it. You can make changes and see the changes in real-time.
If the command wasn't successful, then you probably forgot to deploy the GraphQL schema of your Sanity project with the sanity graphql deploy command. Check back the "Making the blog's content available for editors and for the web browsers" section.
You can find other useful Gatbsy commands here.
When you want to publish changes online you need to commit changes to a git repository and push it. The new changes will be automatically built and applied to your website.
This way you can change the styling of your blog or add new features.
Bonus: Setting up Google Analytics
Go to https://accounts.google.com/
Sign up and log in
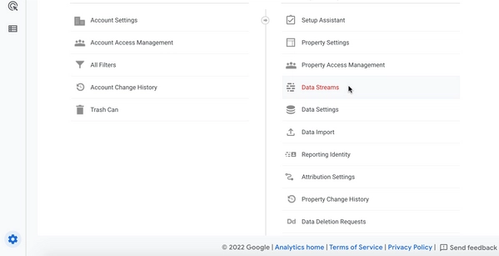
Locale the cog icon on the bottom left corner and on the opened Menu

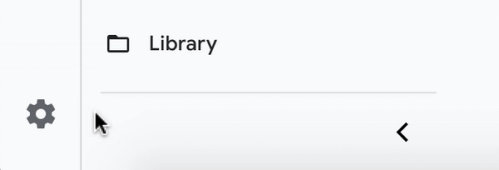
Select "Data Streams".

Select the website from the opened menu. If the website is not added add it like it is described here.

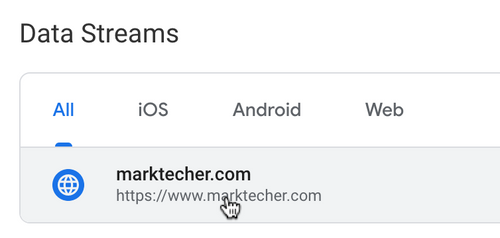
Click on the web entity from the list and copy the value under the "MEASUREMENT ID" text and paste to replace the value next to the GOOGLE_ANALYTICS_MEASUREMENT_ID=
Conclusion
We set up a blog. We can now add new blog posts edit the existing blog posts and publish them to the internet whenever we like to. The CMS is user-friendly and it will make sure that we are publishing content that is SEO friendly. On the other hand, our website is fast, aesthetically pleasing, and is optimized for mobile devices. So users and searches engines would love our website. What is needed from us is awesome content.
Happy blogging!